Soldier Ghosts in Chislehurst Caves

The story behind my Favourite Light Painting image

By chance I saw an advert on Facebook for a light painting work shop in Chislehurst Caves. An Olympus UK event promoting the OM-D E-M1 Mk2 and the chance to play around with its unique “Live Composite” feature.

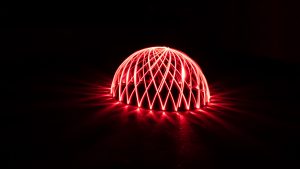
I got me thinking, what would I paint down in the caves.  A while back, I ran a small workshop with friends and came up with a line of stick men walking bay a dome.

lightpainting-dome-army.jpg
Strobe light painting of stick men, around a dome – part of my 365 project of 2017

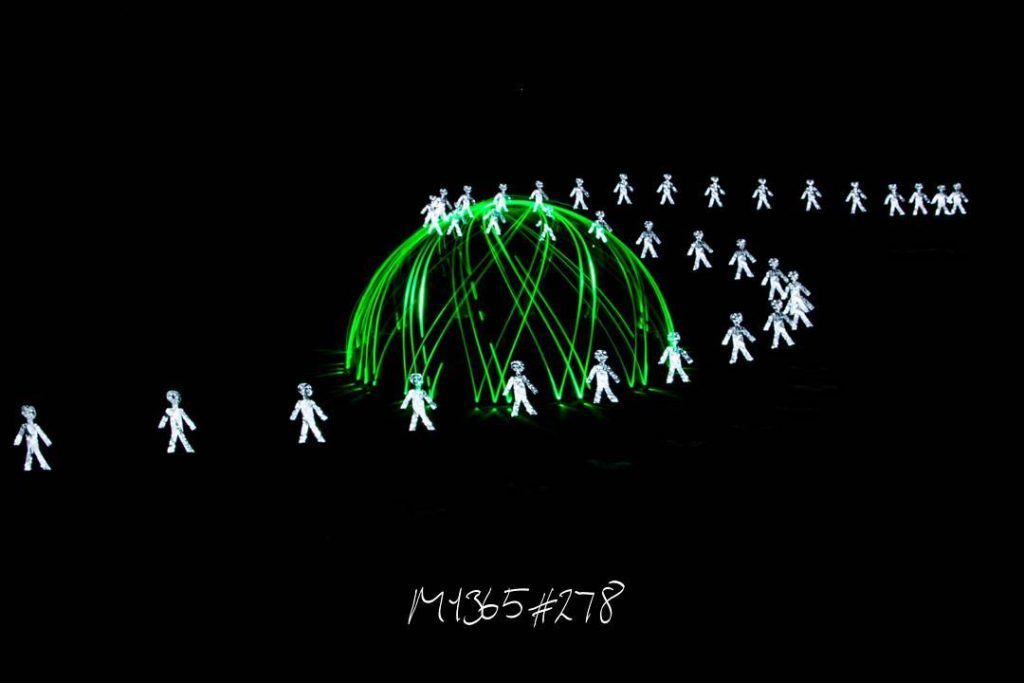
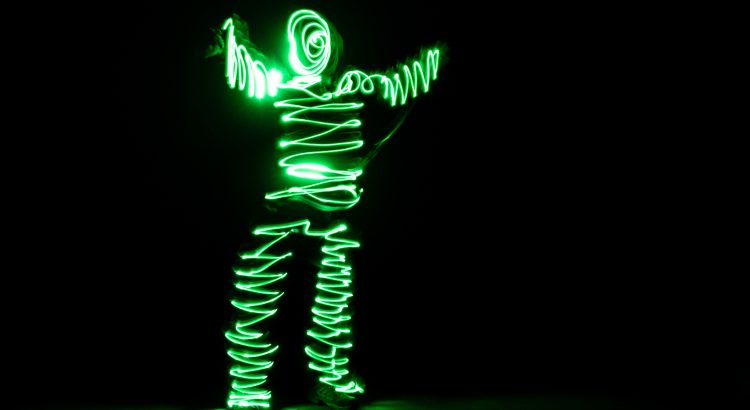
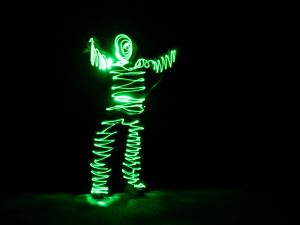
Except now I have some Electro Luminescent wire and reckon thought that could add a new dimension!  So…… I had a practise on the driveway and came up with this.

Stickmen walking on grass past dome

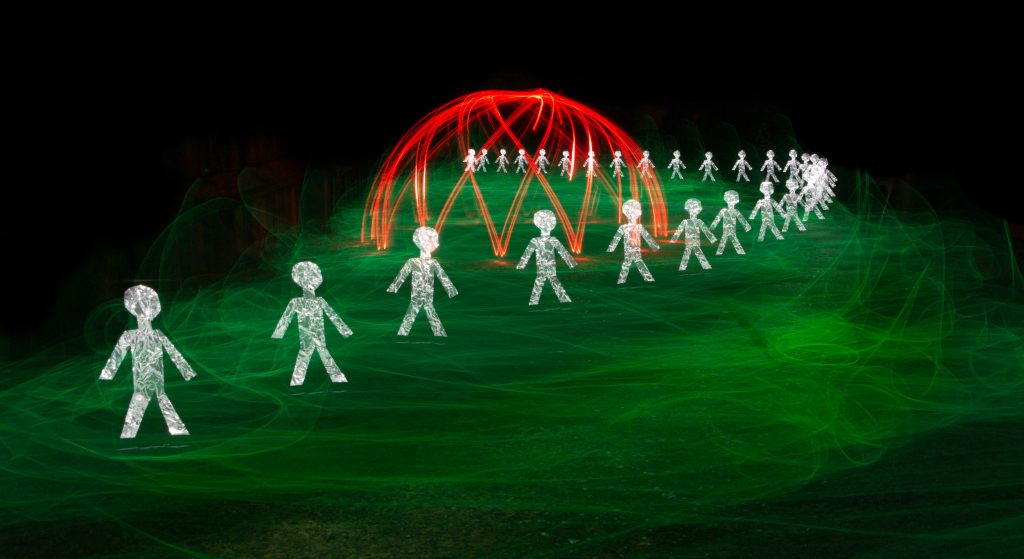
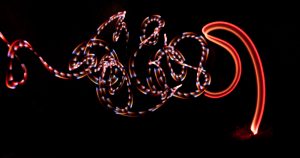
Nice.  The green wire worked really well.  But I couldn’t help thinking it needed something more, so I thought “can I paint a poppy?”.

Had a go…

Light Painting - Poppy
Light Painting – Poppy

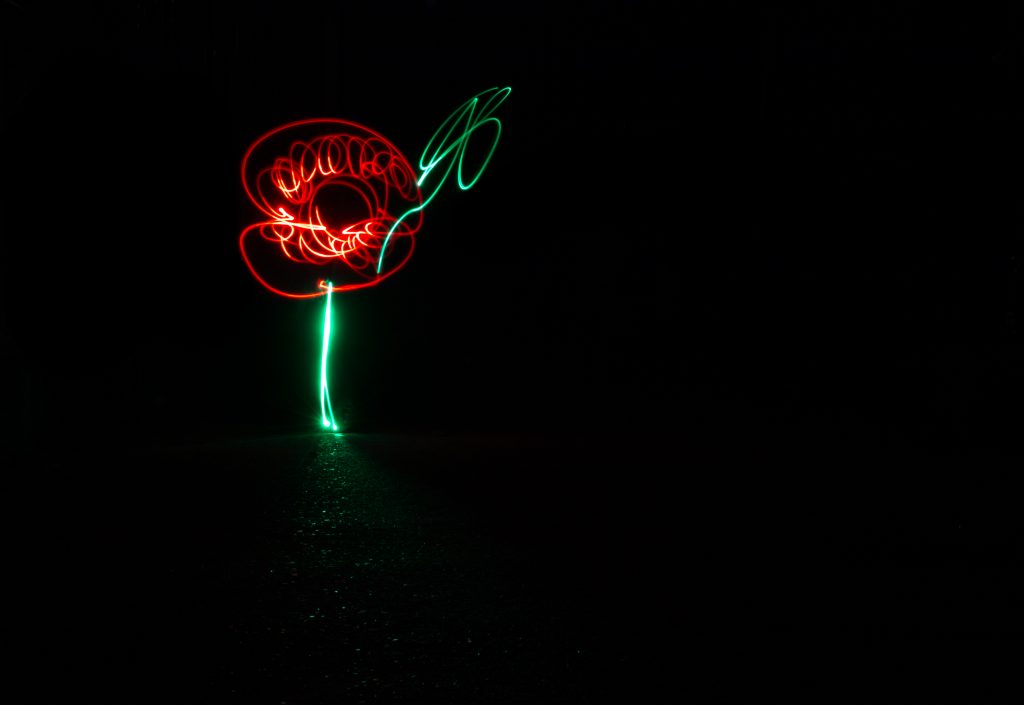
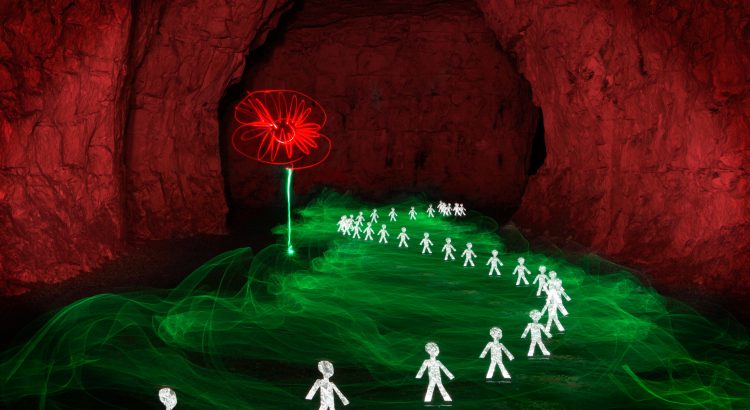
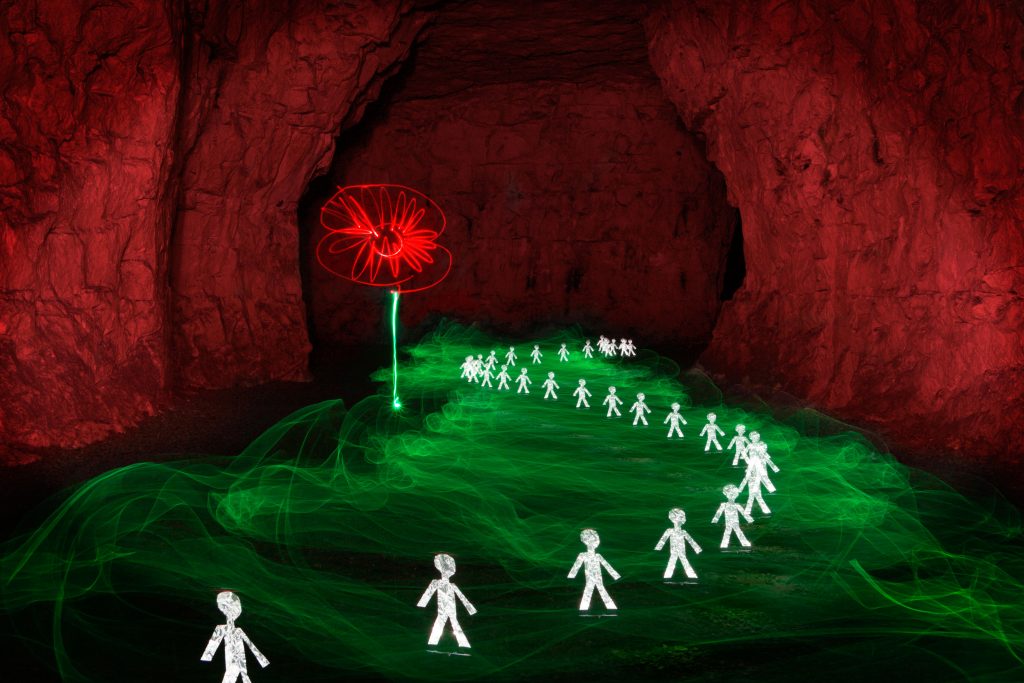
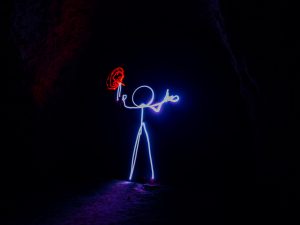
Put it all together and I ended up with this, which I was rather pleased with.

Soldiers Ghosts Marching Past Poppy

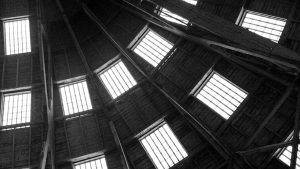
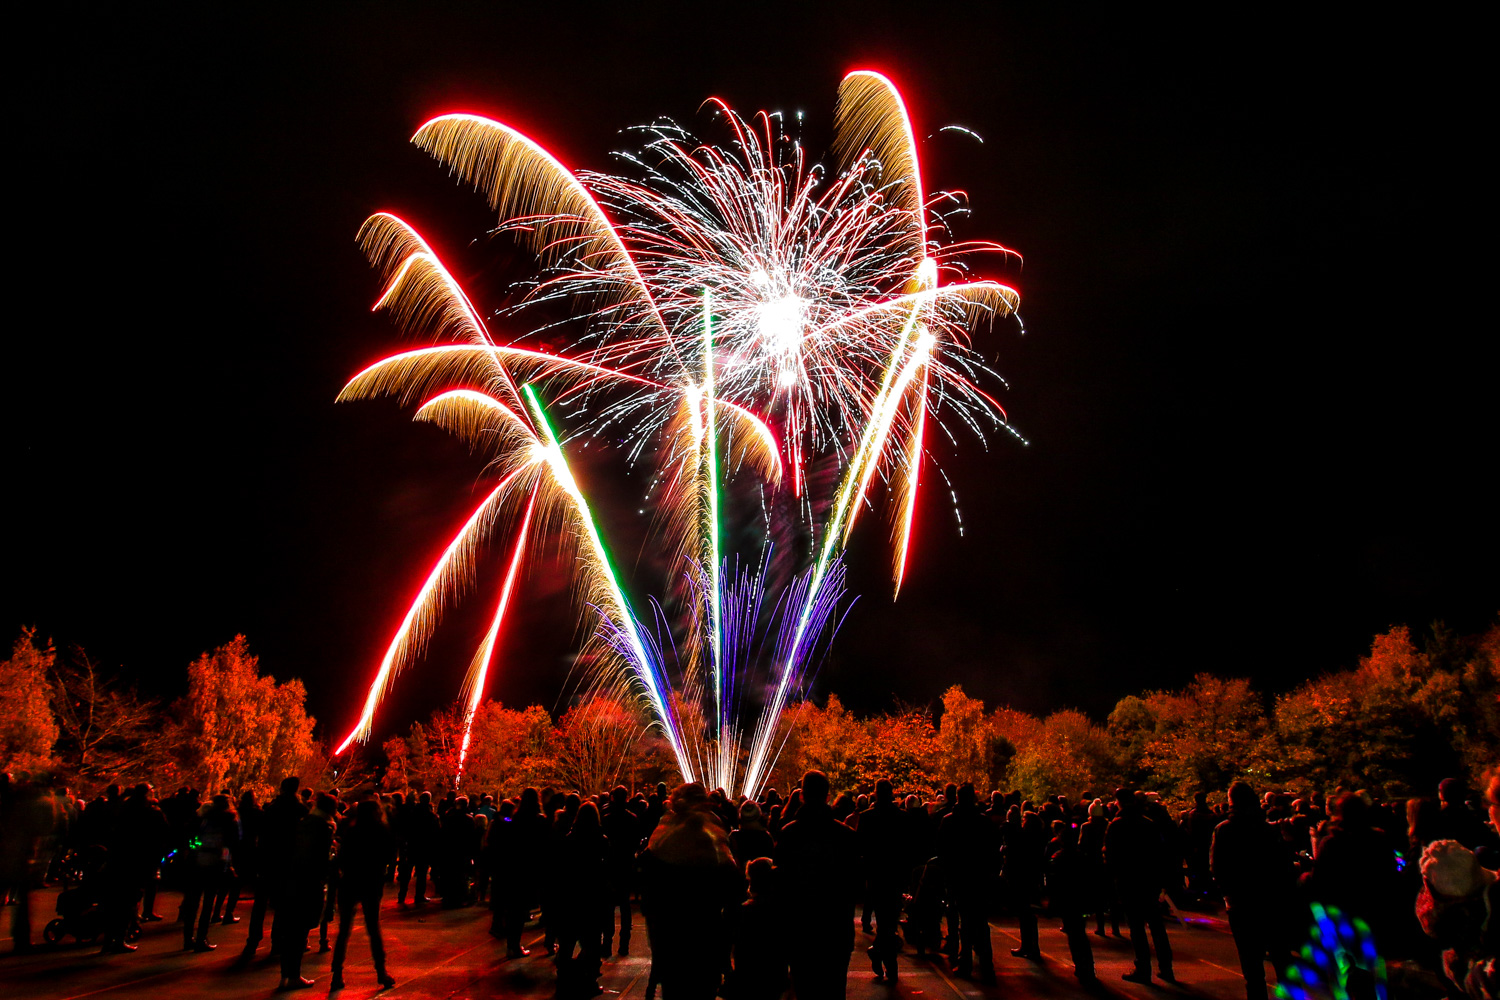
Next stop Chislehurst Caves

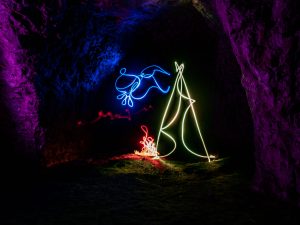
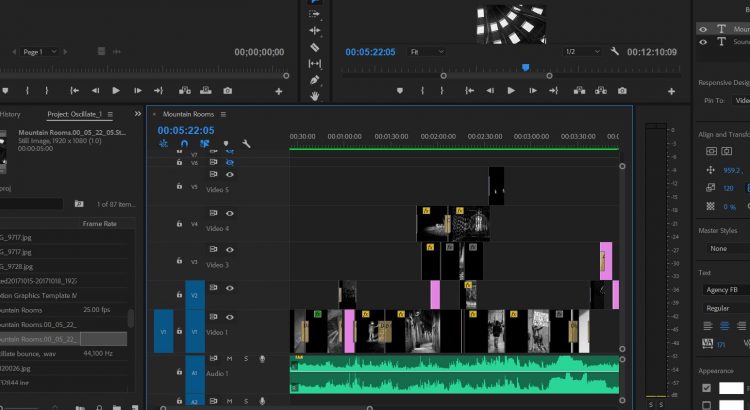
After playing around with the Olympus, which was great fun (see some samples in Light Painting With an Olympus OM-D E-M1 Mk2), I came up with this…

Soldier Ghosts in Chislehurst Caves

It’s still not right, but that’s part of the journey.  I’m sure I’ll revisit this again, but for now (today at least) this is it 🙂

How’s it done?  This was using a Canon 70 with Multiple Exposures enabled.  This shot is 4 images which the camera lays on top of each other.  First the green misty grass, then the poppy, then the soldiers, then the cave walls.  This is nothing new, you used to be able to do this in the old 35mm film days.  However, the bonus of digital, is you get to see each layer, and if you screw one up, you go back one layer and redo it, which I had to with the poppy!

Hope you like it.

Lightpainting with an Olympus OM-D E-M1 Mk2

domeI had the pleasure of attending an Olympus UK Events workshop at Chislehurst Caves, on the 19th October 2010.

We wandered into the Caves and were each given an Olympus OM-D E-M1 Mark II with M.Zuiko Digital 12-40mm PRO Lens, and were shown how to drive the “Live Composite” feature.

As someone who light paints in one shot or by multiple exposures, this was really different for me.  In short, you set you camera up, focus, then hit the shutter.  The camera takes a 2 second “noise reduction” frame, and it’s then primed to start…  Hit the shutter again, start painting, and you can see the image appearing on the screen in real time, bit by bit.  It took me a while to get my head round this, as I’m so accustomed to painting, then running round back to the camera to see what I’ve got.

Thanks OlympusUK Events for putting on this workshop, as it not only provided the opportunity to try a new camera, but also meant I had the chance to recreate an image I had in mind “Soldier Ghosts Marching Home“.  Though I had to resort to using my own Canon 70D, as I’m familiar with it.  Read this post “The story behind my Favourite Light Painting image” to see the image and how it evolved

Some of these shots are me simply driving the camera, and other’s me painting.


mountain-rooms-editing

First Photo Montage to an ambient Soundscape

Mountain Rooms video thumbnail

My first photo montage – Mountain Rooms

I was recently asked if a friend of mine could use photos from my Driving Lights collection.  I was delighted and said yes.

A few days pass, and he asked if I could provide another set of photos to accompany a live performance of a Soundscape, by Diane Dunn, during the same gig.

Having never done such a thing before, I naturally said yes!  I was sent a wav file of the piece, no title or story behind it, and was left to my own devices.  The only remit was it should be black and white, which made life a lot easier, not having to worry about colour matching, etc.  I’m not sure it would have worked well in colour anyway.  mountain-rooms-editing

At first, it did seem a bit weird, but as I browsed my photos, inspiration slowly grew and I began to piece together a to timeline using Premiere Pro.

It took a few passes; and at 12 minutes long, it took longer than I thought, but it grew on me, both the piece and the process.  It’s rather satisfying when you find an image that really fits in with the sound, like a ‘bingo!’ moment.

The gig went very well, and Diane was pleased with my montage, a huge relief, especially as I was unsure if my photos fitted with her vision, let alone the name of the piece.  Funny how sometimes, things come together.

This experience has been inspired to give this genre a go myself, and so i have begun experimenting recording out and about with my Tascam DR40. (though I need to get a wind shield for it!).

Have you got any photo montages to share?  What do you think?  Let me know below.

#162 of my 365 project

Gig Photos – The Orange Circus Band

#162 of my 365 project

Took the camera with me to Horsmonden’s Summer Festival, as I was playing there with TWUNT, and The Orange Circus Band were headlining, and I like them!

The nifty 50, did catch some nice shots, in very low light, so was pleased with the results.  The biggest problem, was the lighting.  The red lights were so strong to the right of the stage, they washed out the fiddler and bass, making them look radioactive!  That’s why their shots are black and white, which fortunately look even better!

Don’t you just love it when you have a spot of fortune whilst processing in Lightroom 🙂  They liked them so much, they’re on their website too!

Under water balloon pop

Fast Flash Capture of Stuff Falling into a Fish Tank

Fruit
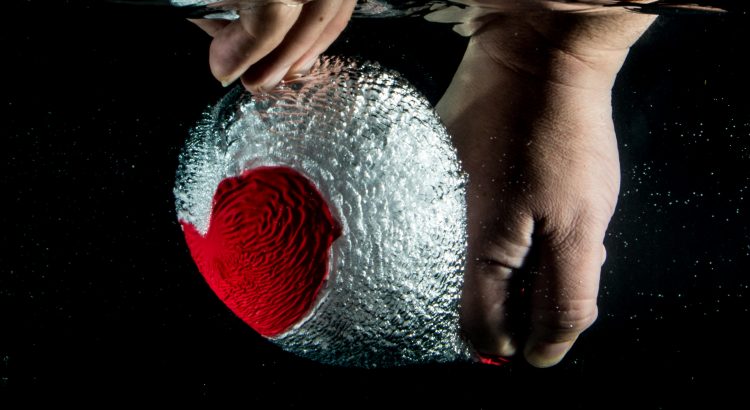
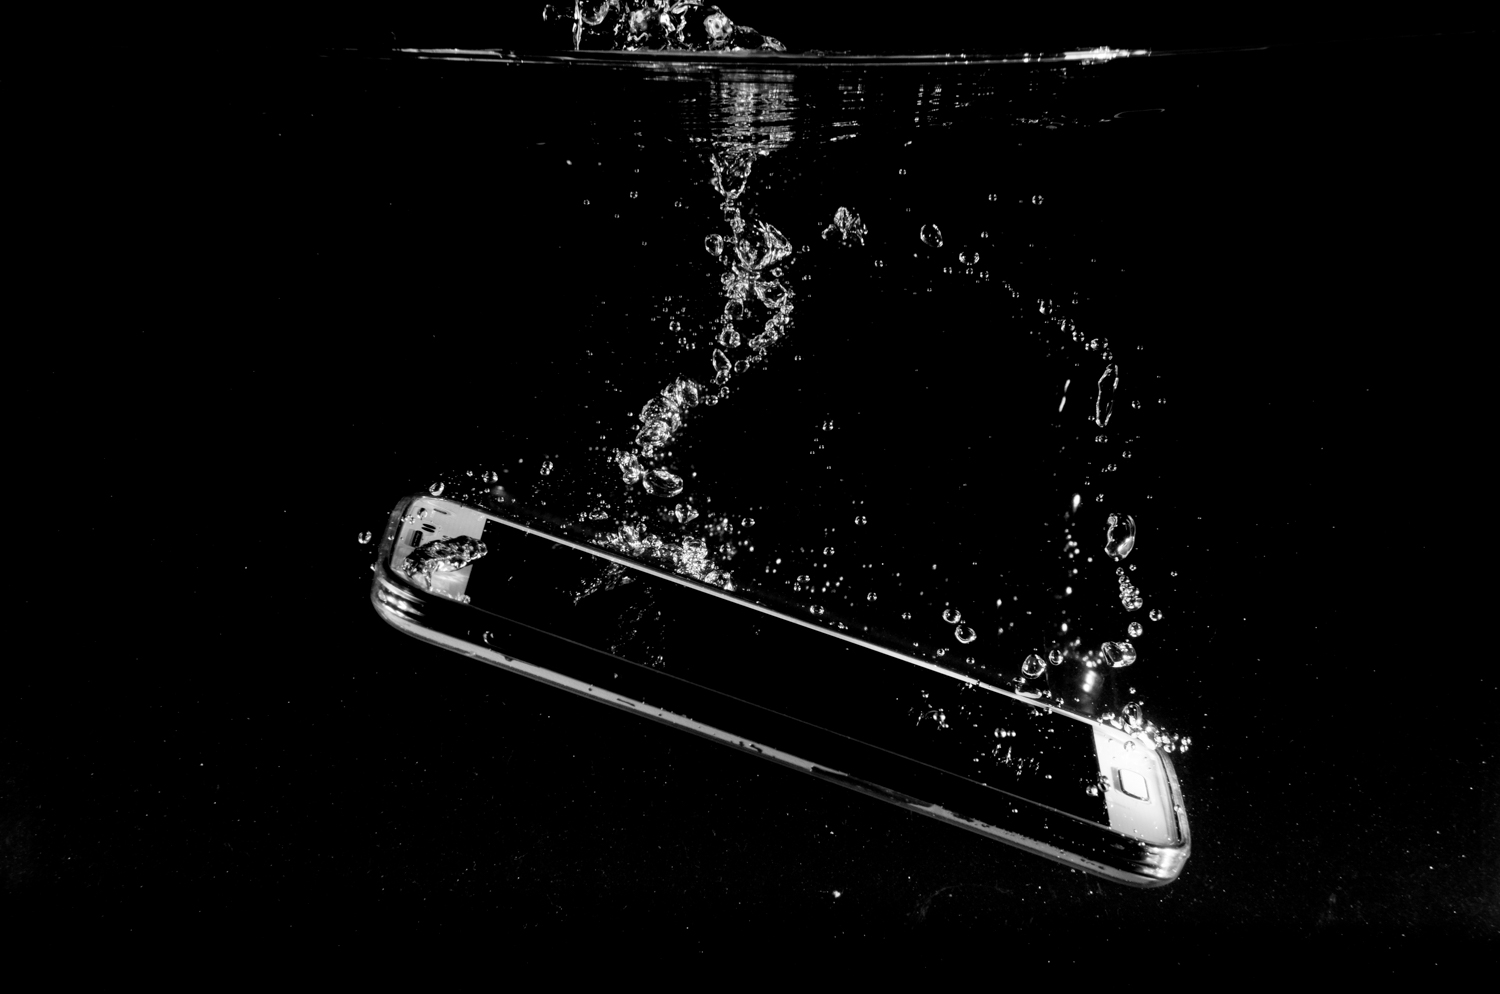
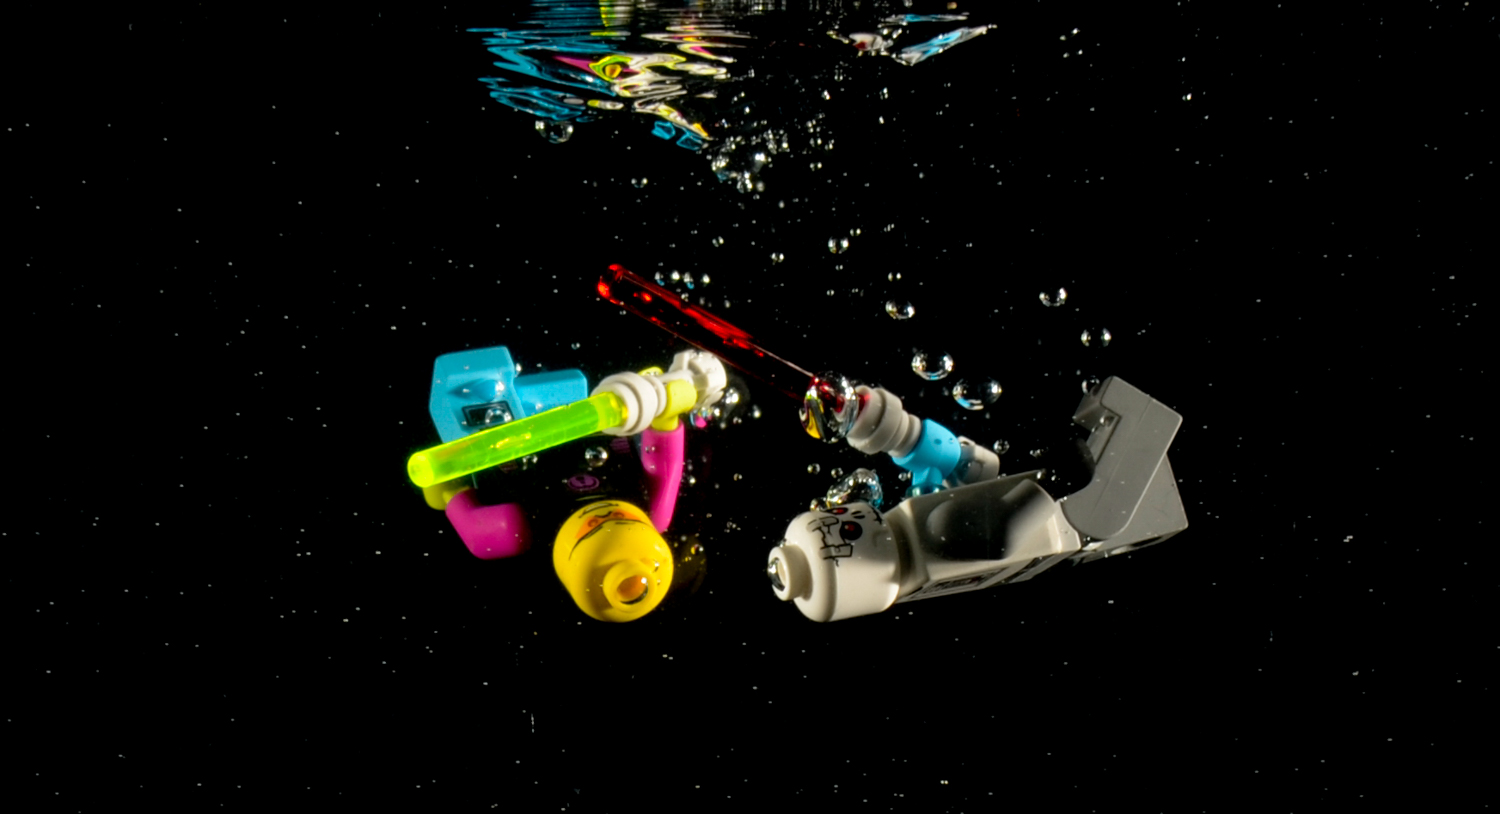
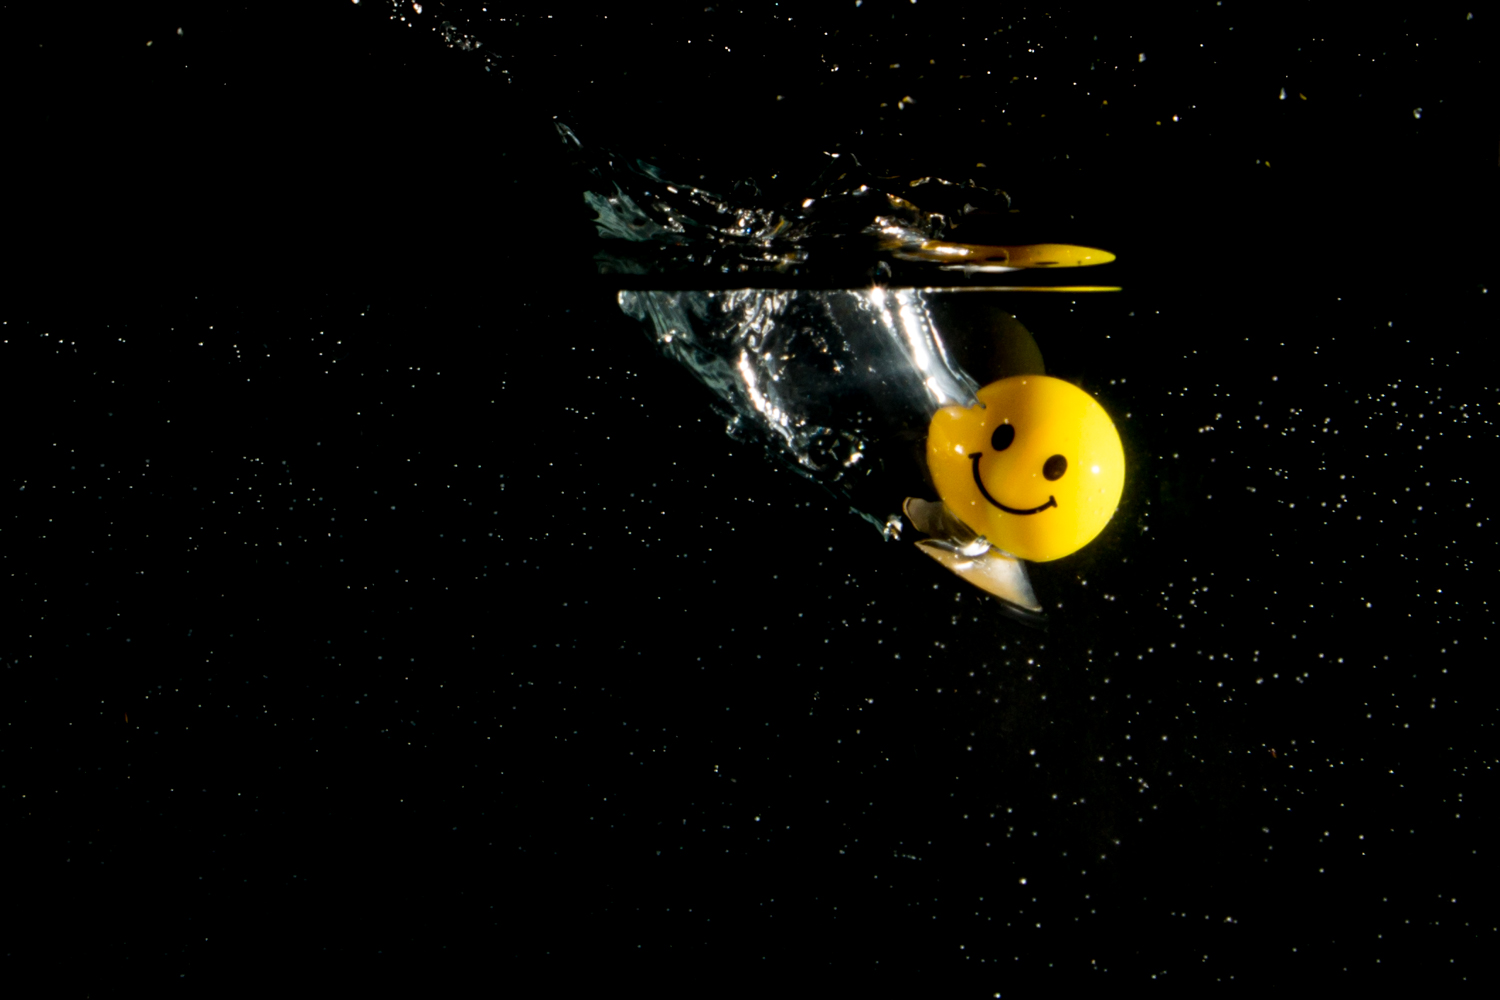
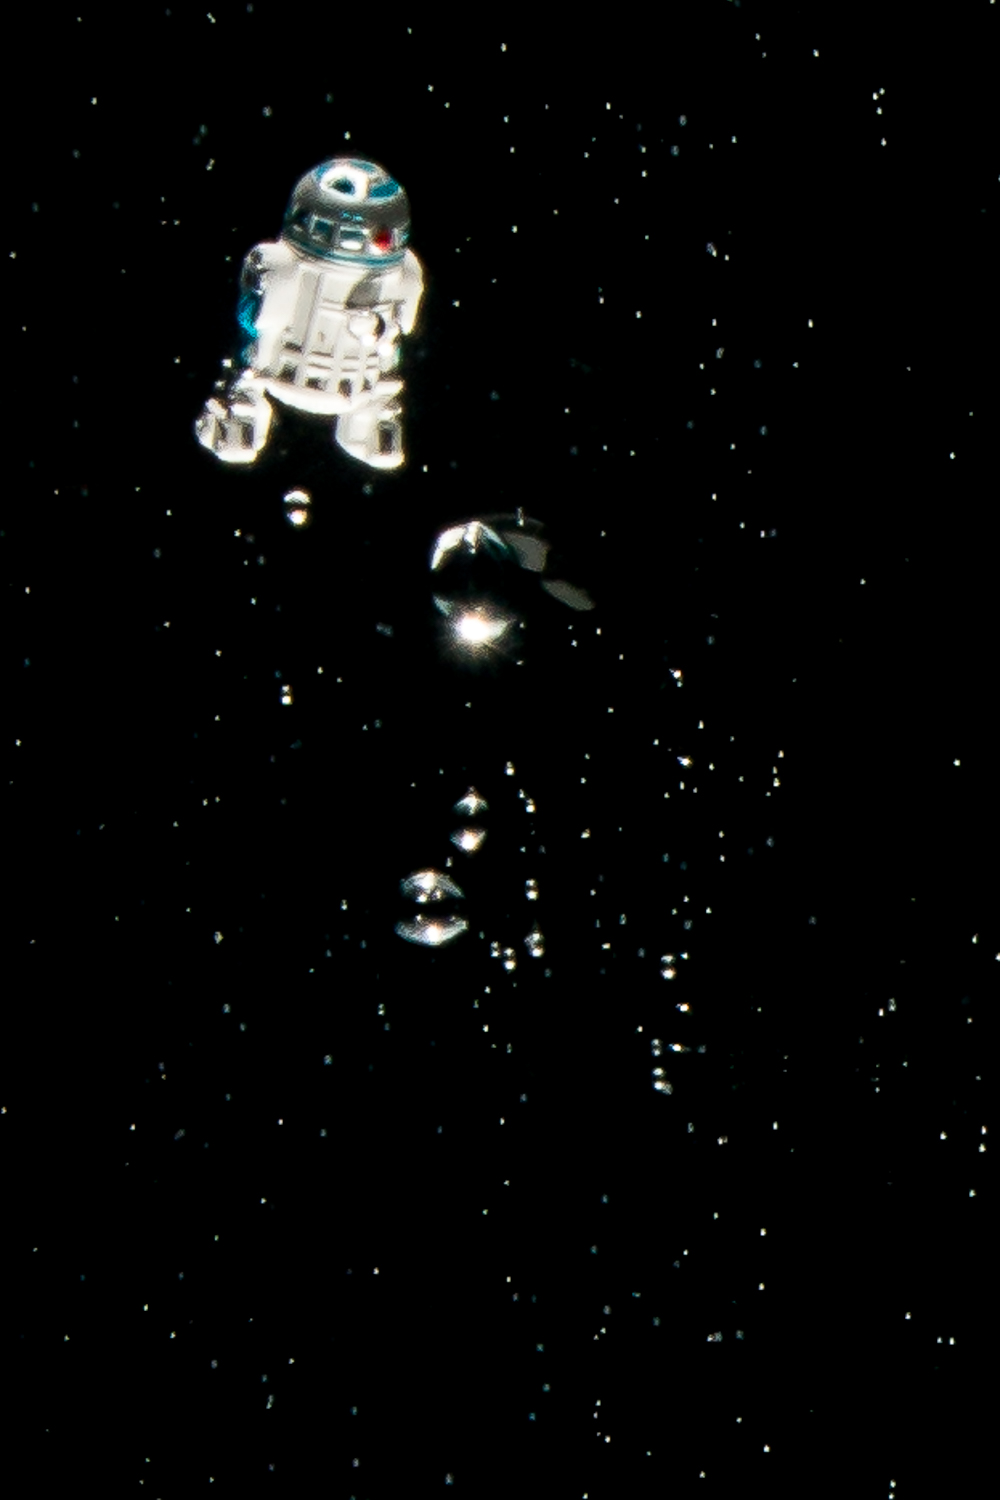
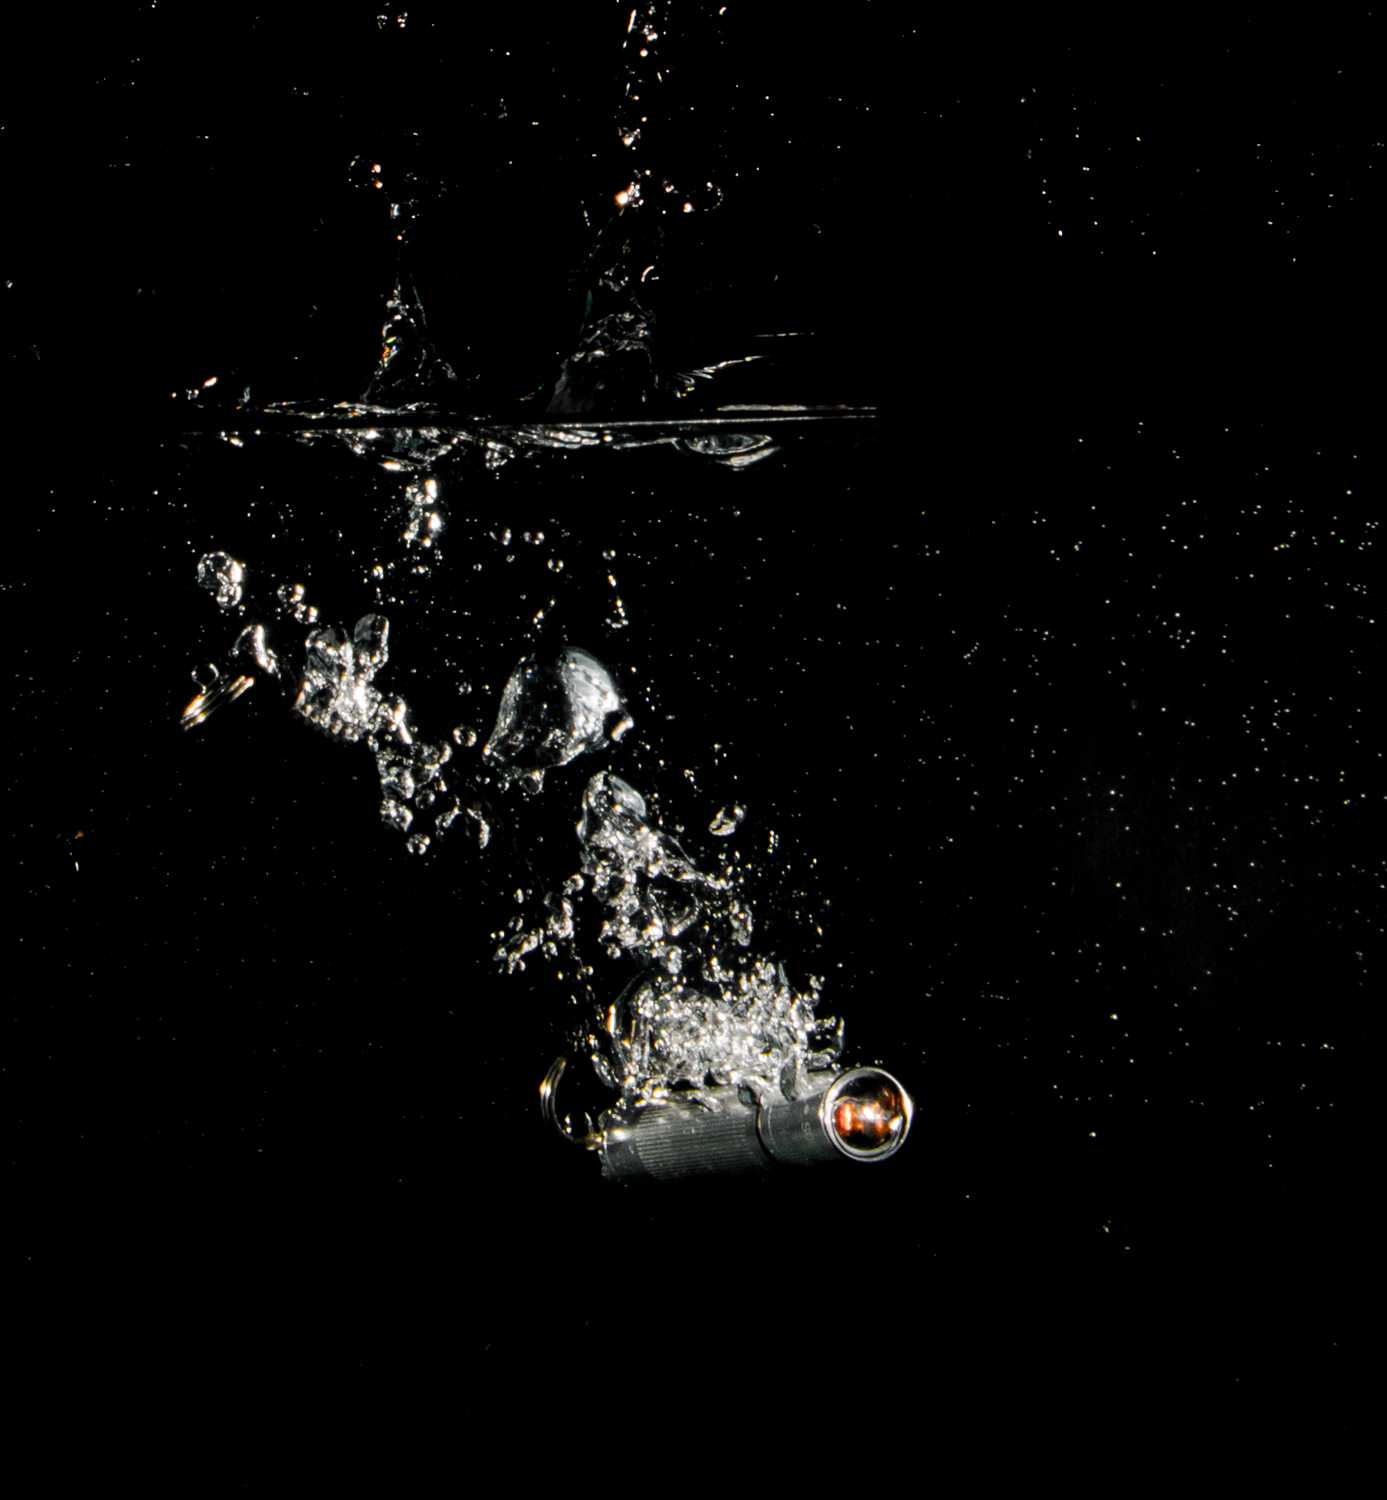
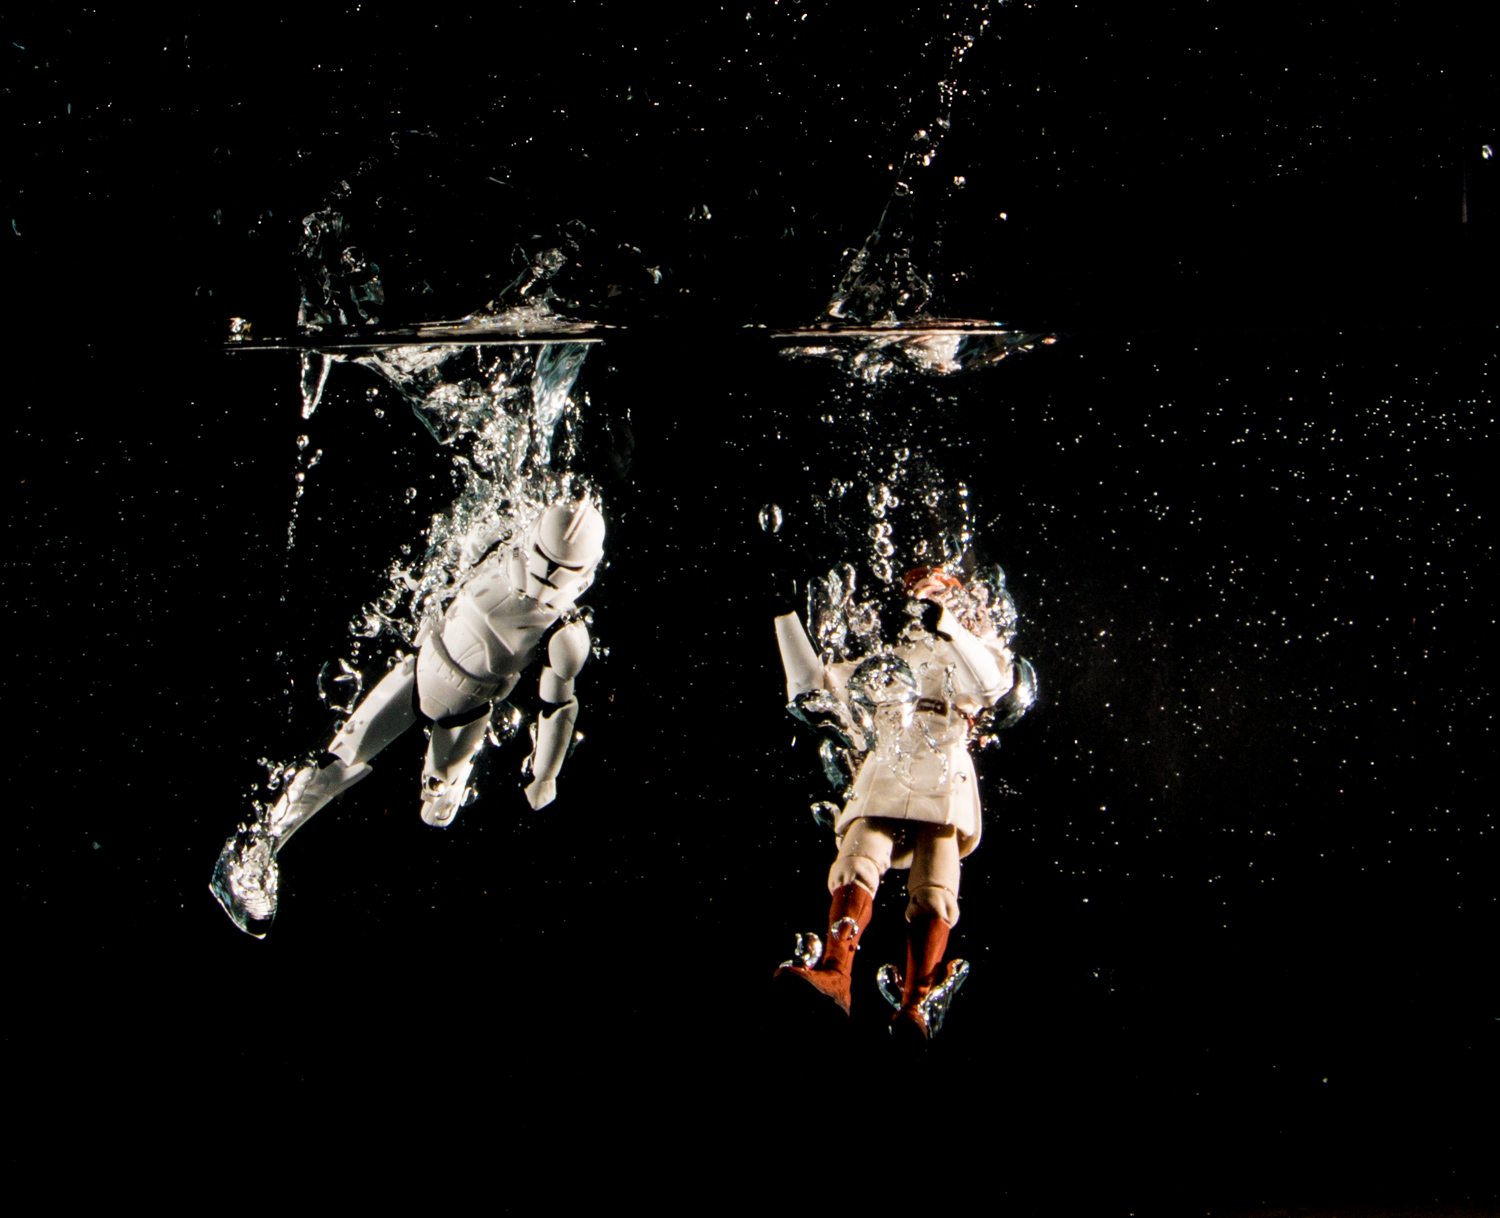
At a recent meeting of a camera club, to which I belong, we thought we would have fun with a fish tank of water, two flashguns (speed-lights), a black backdrop and some small objects to drop into the water.

Needless to say it was great fun and another one of those photographic exercises that generates the excitement of the anticipation of what you’re going to get.

We’ve all seen these types of photographs, which can look very impressive, but look beyond the reach of the amateur.  Not so!  It’s surprisingly easy.  However – the caveat is, you have to take loads of shots, and there’s an element of ‘lucky timing’ required.

The tank set up
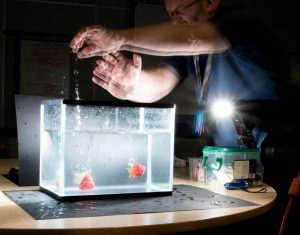
The setup is simple, but will require at least 2 flash guns and a remote flash trigger to trigger both simultaneously.  You could do it with 1 flashgun, but it will be harder to illuminate more than one angle.

Next you need a tank of water with some black card or cloth behind it.

The room needs to be in near total darkness when you take the shots, then you use your flash guns to light the objects as they fall in the water.

Get your camera on a tripod, then focus it at the distance at which your objects will fall into the tank.  Get an assistant to hold an item in the tank, then focus manually.  Set the camera to F11 ‘ish’ and your lowest ISO.  Yep – You’re going to use ‘M’ manual mode.

The key to what freezes the shot is not your shutter speed, it’s the duration of the flash!  Set you flash output (in manual mode) to 1/32 or 1/64.

You can try to capture the shot buy using fancy infra-red beam, that triggers the flash as the object passes through it, whilst your camera is on a very long exposure.

OR, as we did, set a shutter speed to 125th and set shutter to continuous shooting.  The fact your flash is set to a low power output, means it should keep up with the burst firing of your camera.  Again, remember, it’s the flash that freezes the action, not your shutter.

Get your assistant to hold the object above the water, then countdown out loud 3,2,1…GO.  Hold down your shutter button from GO.  Then enjoy the excitement of seeing what you’ve caught.

We experimented with dropping fruit, miniature Star Wars figures, Lego figures and finally bursting a balloon under water.

Under water balloon pop

The shot and, coincidentally the last shot, of the day was this, the balloon pop.  The timing was such, that we could still see the shape of the balloon as air bubbles, before they started to race to the top of the water.

There is some post processing to be done to get what you see here, but nothing complicated.  You are likely to see light reflects around the tank, such that you can see reflections on the walls of the tank.  The solution is to reduce highlights, darken shadows and blacks, in Lightroom/ Photoshop or your favourite editing program, to make the background as dark as possible.

I use Lightroom, and found darkening blacks, shadows and upping clarity did the trick – with cropping too to remove your assistants arms!

So give it a try – it’s fun.  Enjoy photography!

Here’s a gallery of the other shots.

Photo shoot with a Mobile? Is it possible?

Photoshoot with Mobile Phone
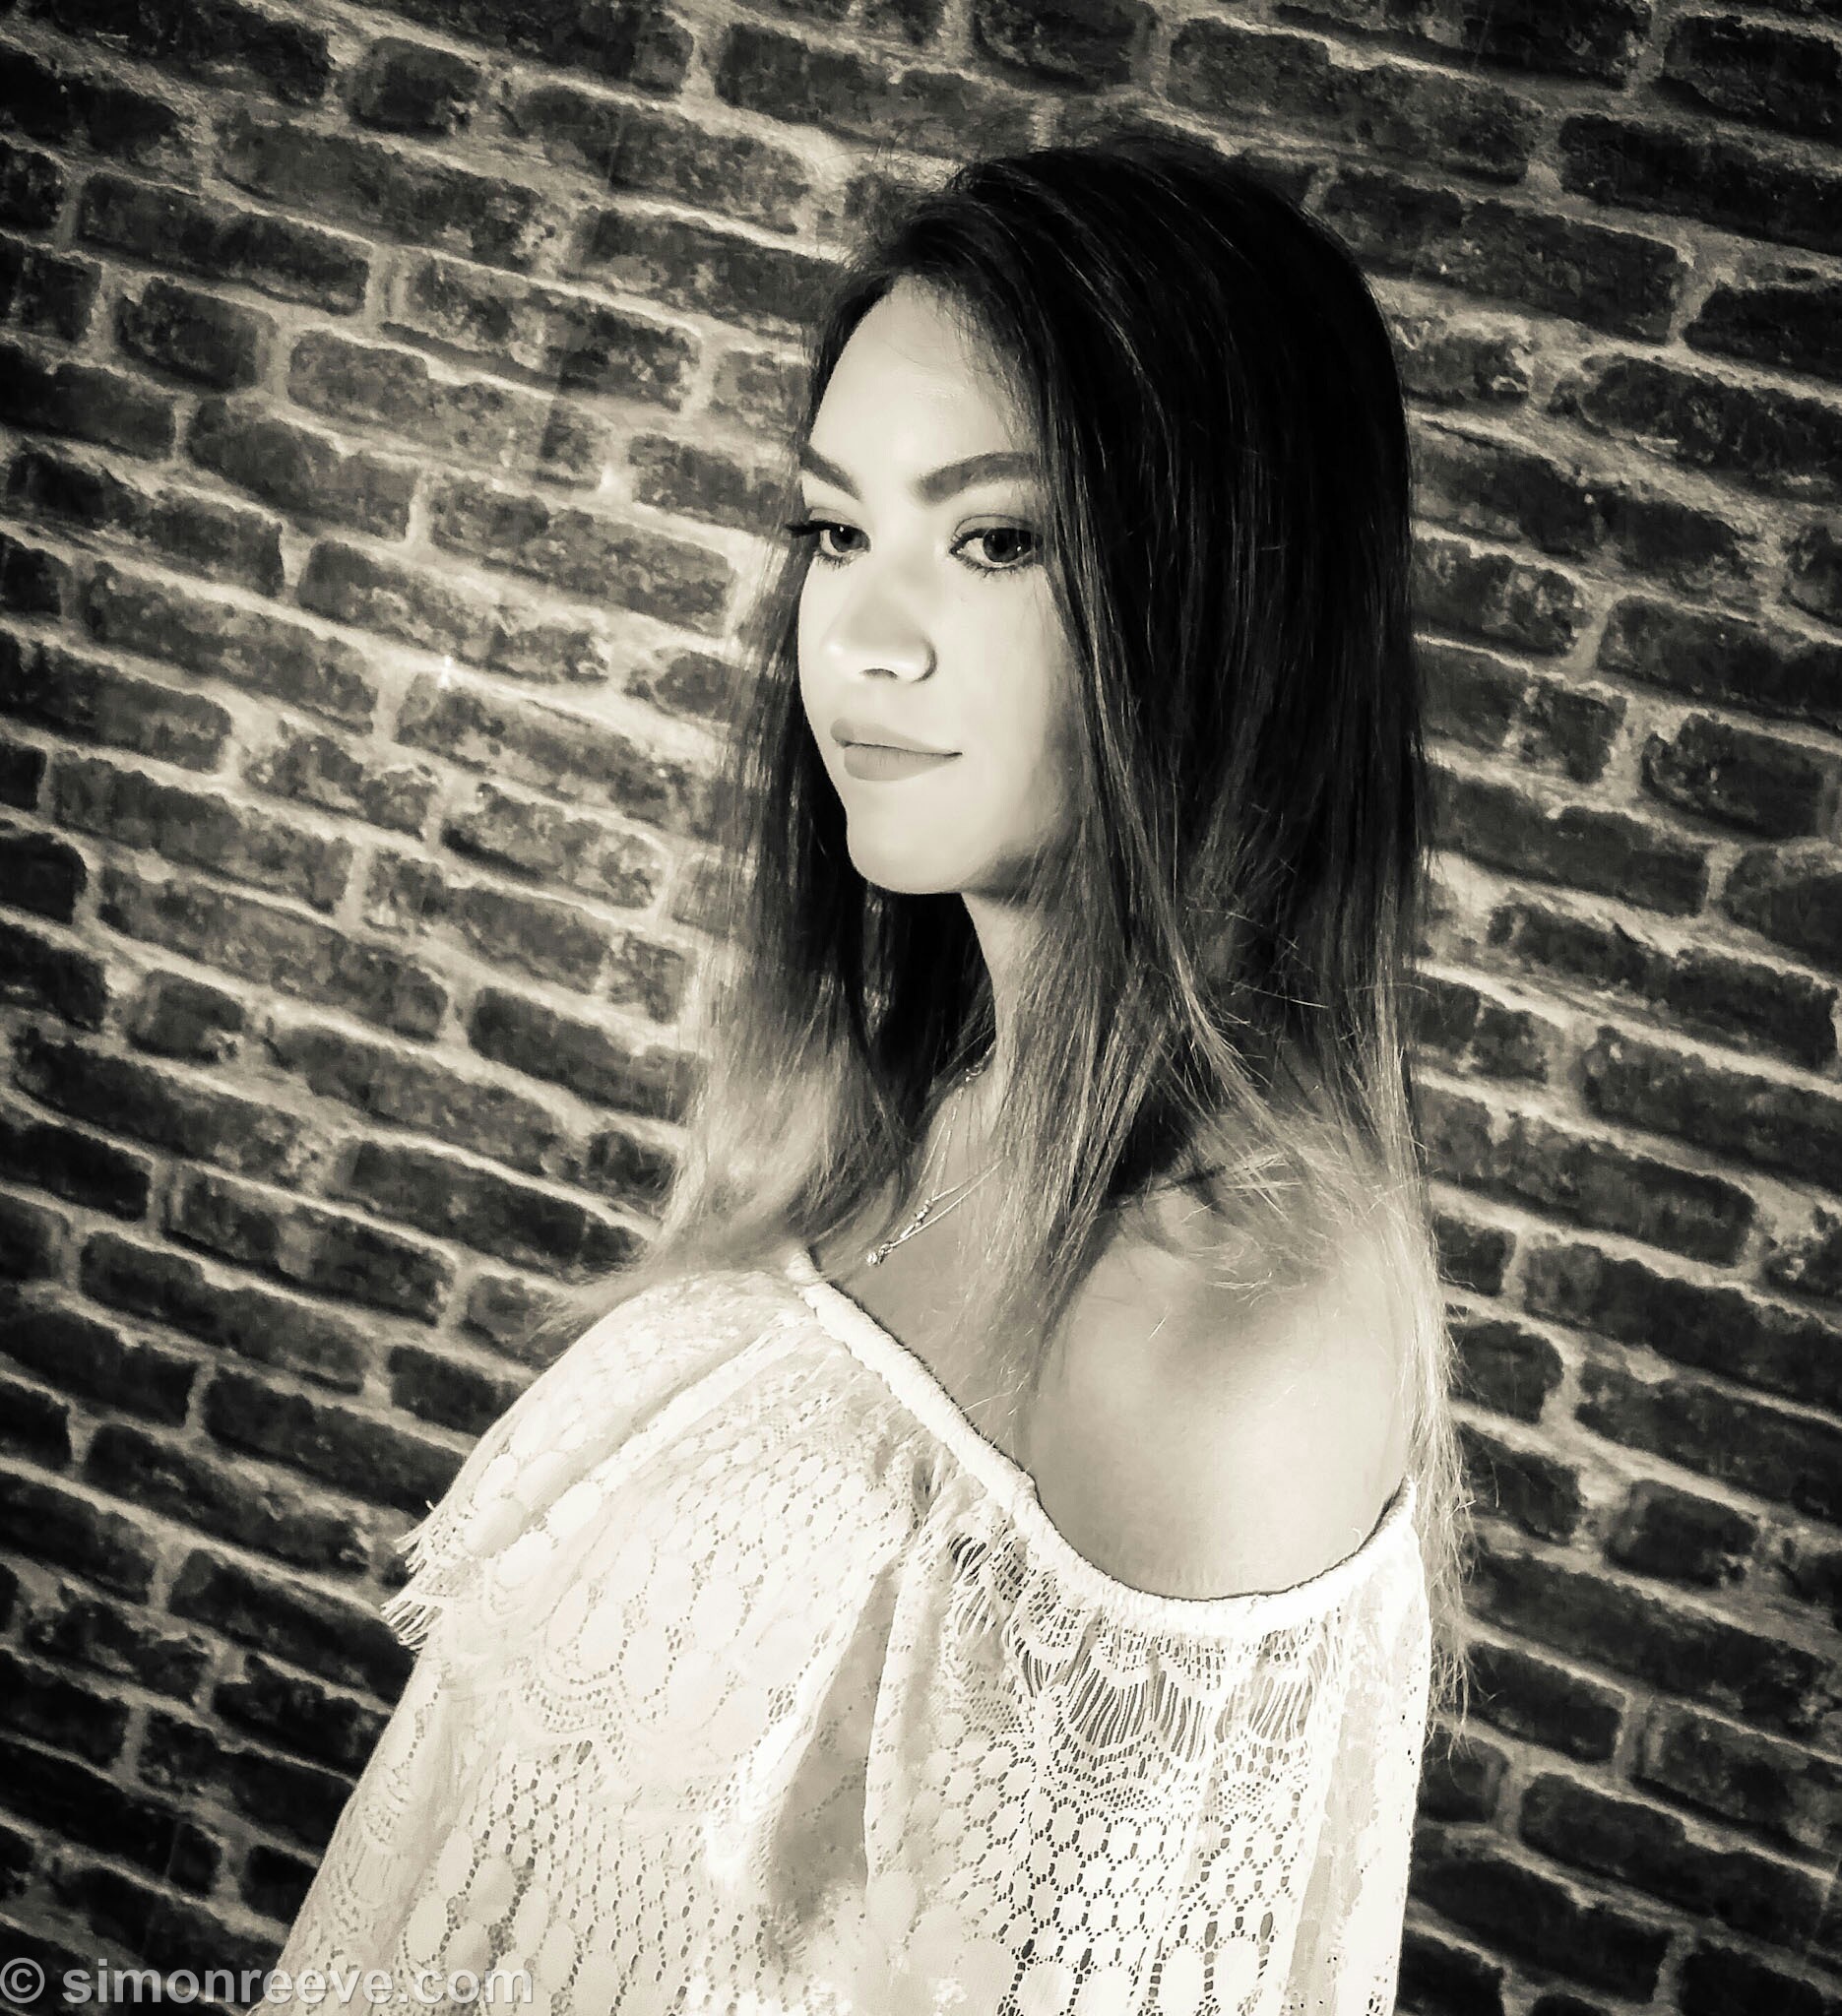
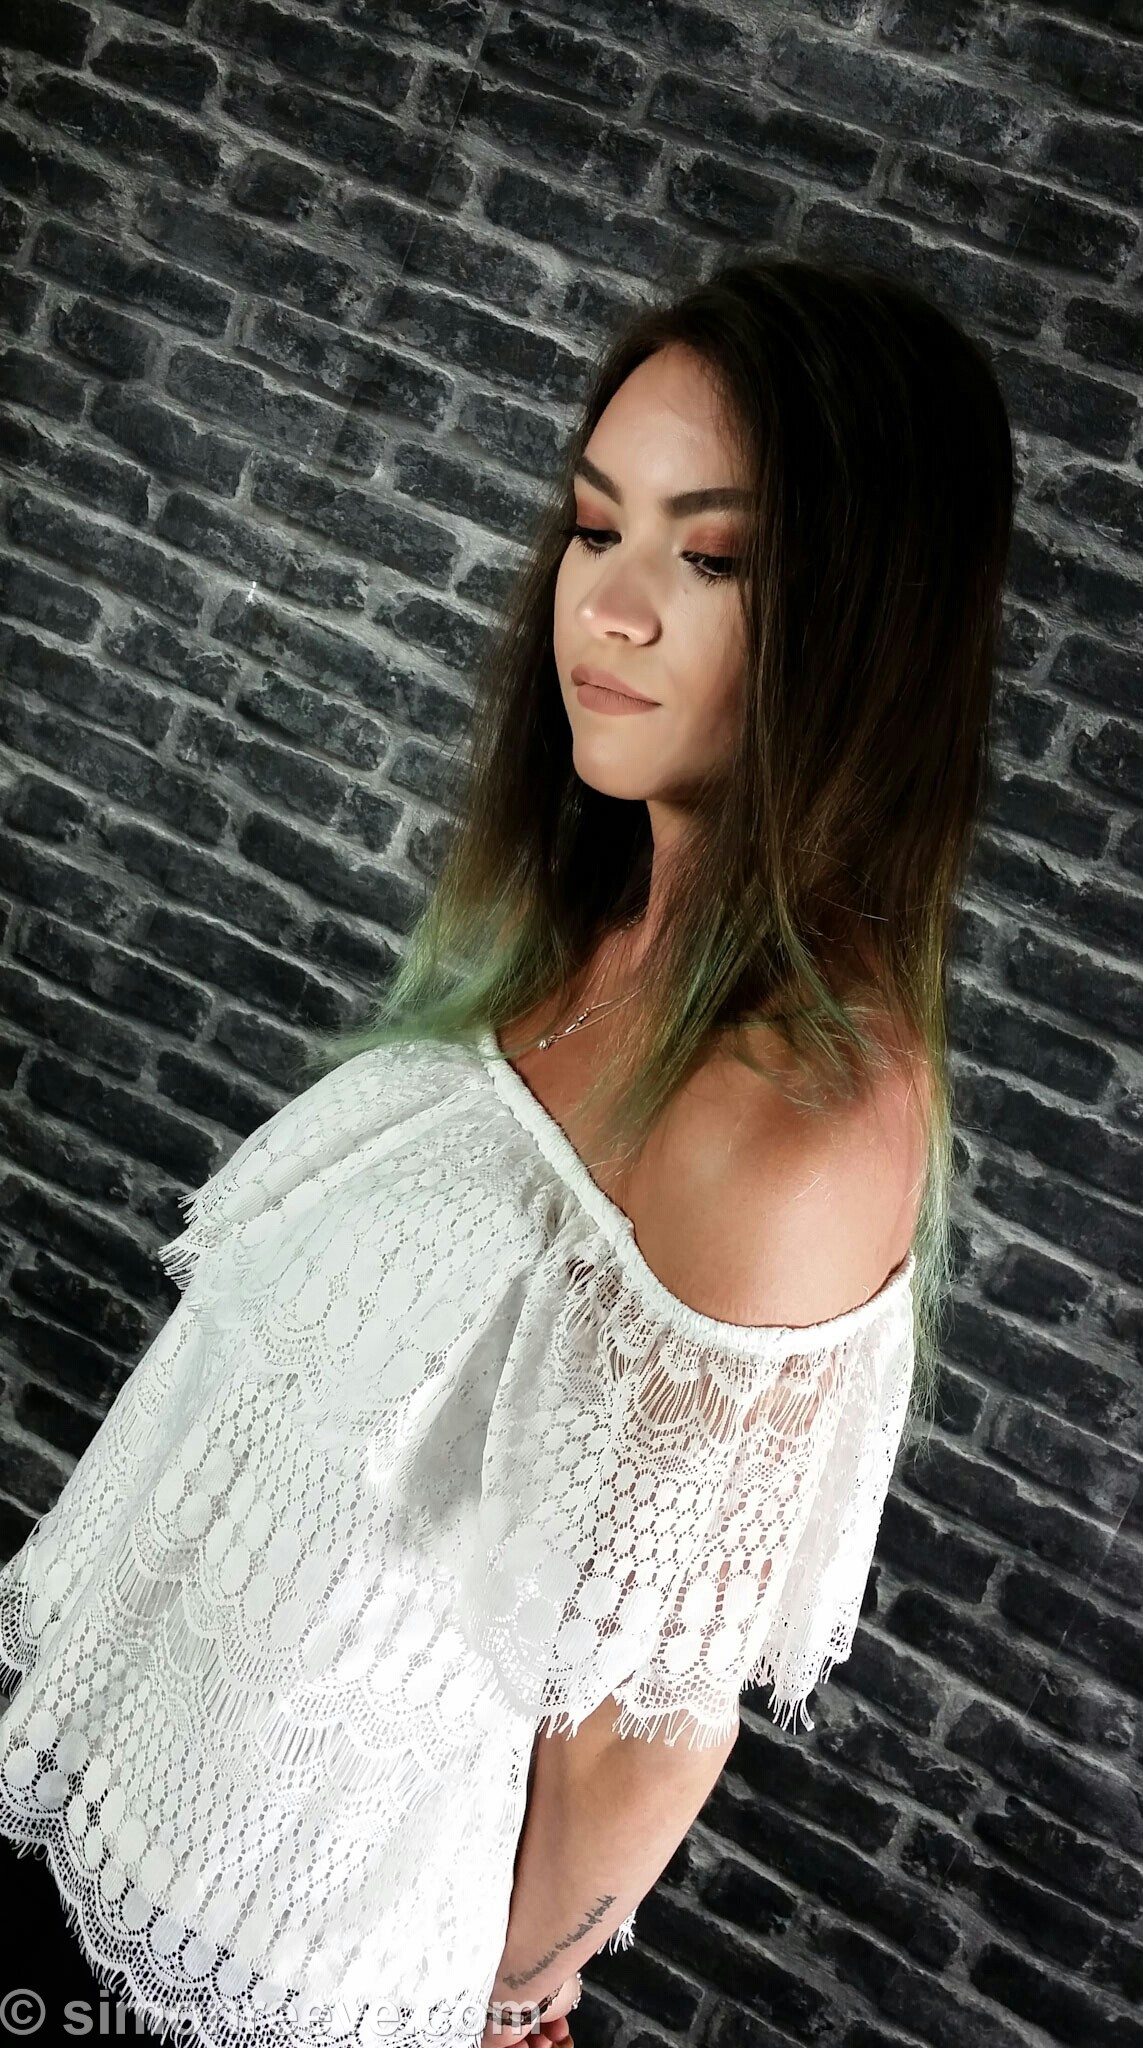
Last week I attended a ‘photo shoot’ at our monthly camera club meeting.  The shoot was all about using continuous lighting, with a very patient model present.

One problem!  I forgot to bring my camera with me!  How could that happen?  Well, it just did.

Much to the bemusement of the rest of the group and the model, I pulled out my mobile phone, a Samsung Galaxy S5.  I must admit, to thinking this is pointless, but took one shot, and it got me thinking.

I thought I’d take this fateful opportunity to do a shoot using just my mobile phone and that includes post processing!

Taking portrait shots with a mobile phone camera meant I had to get in real close, closer than normal.  But we soon got the hang of it, the model, myself, and the other photographers, whose view I obscured 🙂

I didn’t play around with the settings, just turned off flash and let the phone to do the rest.

Next step – processing.  For some time, I have had Adobe LightRoom Mobile on my phone, though never really used it much.  Again, this fateful camera club meeting, meant I had the perfect opportunity to test it our, importing, processing and exporting (in this case to Facebook).

I took me longer than usual, but I’m not as familiar with LightRoom Mobile as on the PC.  I did find it easy to do all the typical things I do on the PC version, and soon had my selection to upload.

Now I’m not saying it’s time to ditch the DSLR, but it does show just how far mobile phone cameras and software have come.  It also made me think differently, not using a view-finder, for one thing.

Maybe challenge yourself to just use the mobile, next time.

Tunnel Gallery Preview in virtual 360

Here is a 360 view of the front of the Tunnel Gallery.  A virtual sneak preview 🙂

My work is the collection of photos on the left, whilst the large abstract paintings are by my friend Scott Heasmer.

Tiz Bell-Richards, features in the rear of the gallery (out of view)

Come and see them in real life at The Tunnel Gallery, Tonbridge School, Tonbridge, Kent from Monday 21st March to Monday 28th March 11am – 6pm  (event night Wed 23rd March 7pm-9pm)

StickMan on Bicycle

Event Night at the Gallery

Update for our Gallery Exhibition

We will be having an event night on the 23rd March form 7pm to 9pm.

You will get to hear myself, Tiz Bell-Richards and Scott Heamser talk about our artwork, over a glass of wine.

Plus, time and space permitting, I will put on a light painting demo, with a little
audience participation.

Event Info:
The gallery is open from the 21st to the 28 March, 11am – 6pm
Event Night – 23rd March 7pm – 9pm

How to get there http://www.tonbridge-school.co.uk/contact-us/maps/
The ‘School Grounds’ link on the page highlights the Tunnel Gallery location.
School visitor parking is in The Quad

Poster

Finally going public in a Gallery, Photographically!

Before Christmas, two artist friends asked, if I would like to join them, hiring a gallery to show my work.

Well….  I had to take on the challenge, having never shown any of my work before.  My photography has always been a hobby and private, focusing mostly on friends and family, with the arty creative stuff, always taking the back seat.

The Tunnel Gallery, at the Tonbridge School has been booked and the race is on!

We (Tiz Bell-Richards, Scott Heasmer and I) shall be showing the week of the beginning the 21st of March 2016 through Easter to the the 28th March, Easter Monday.

Tiz specialises in very detailed illustrative artwork – http://tizbellrichards.com

Scott’s speciality is larger abstract work that captures the imagination.

My speciality is “the new to me”, i.e. I like to experiment, rather than try to reproduce photos already produced, and that’s no mean feat, now everyone’s got a camera!

One theme I shall be displaying is “Driving Light” –  a slight twist on light painting, in that the camera is moving, as are some of the lights, whilst driving.  I love this form of photography, as, whilst digital, it still gives you the “what will that look like” moment.

Poster


Fireworks at St John’s 2015

Took the camera to take a few shots of this years Fireworks display at St John’s School Tunbridge Wells.

This is the 3rd year of them running the show, and it’s great.  Thankfully the rain faded away in time and the display provided some lovely shots.

I was planning to experiment with taking shots whilst moving out of focus to get some images of firework trails moving from crisp focus to lovely blotchy soft edges, but for whatever reason, I couldn’t get it right!  Will have to try next year.

Here’s my favourites from the evening, taken with a Canon 70D and the 18-135mm zoom (and a tripod, of course 🙂 )

1st go at HDR Photography

I’ve had a go at HDR (HighDynamicRange) photography.  I’ve heard about for a while and recently Googled to learn more and have a go.  There’s a fair amount of info on the web (including this bit now!), and loads of examples on Flickr.  It seems some people don’t like it, but for some shots, it does create a high contrast wow factor, which I quite like.

I’m no expert, but here’s what I’ve found out.  In short, it’s simply take at least 3 shots bracketed -2/ 0 / +2 stops.  Then with some HDR software, merge them together, and twiddle with the sliders till you have the effect you’re after.

There’s more to it than that really, and here’s what I’ve found out so far, including my first HDR image.

The images should align, else when merged, the result will be blurred:

Use a tripod! (if you’re steady, then hand held is possible)

void anything that moves, unless you want blurring on purpose such as waterfalls.

Depth of Field – you should use aperture priority to ensure consistent depth of field, and manual focus too sometimes, to avoid autofocus picking different points from shot to shot.

Once you have your shots, the next thing you’ll need is software to process the images to an HDR image.  It seems the most popular is Bracketing.  My camera (Olympus e620) will do auto bracketing, but only 3 shots and only +-1 stop.  My Googleling suggested, for the most part, that +-2 stops is better.  I haven’t experimented enough with 1, 2 or even 3 stops to be able to comment properly.  I’m using 2 stops if using tripod and, if I have to take shots handheld, then I use the camera’s one sop auto bracketing.

Photomatix from HDRsoft, but I stumbled across Picturenaut, a free alternative.  So “Free” will do for now, until I get a feel for how this stuff works and whether I like it.

So here’s my first HDR image using Picturenaut.  This bench’s graffiti caught my eye, shot sunny day, with the bench half covered by shadow from trees above and behind.

The 3 shots were taken on a tripod with -2/ 0 and +2 stops respectively, then the HDR image below that.

Feel free to comment below.  I hope to report back with more HDR stuff soon.

The Epic Bench (-2ev) The Epic Bench (0ev) The Epic Bench (+2ev)

Here’s the finished image (on Flickr)

The Epic Bench in Royal Tunbridge Wells

Olympus e620 Grainy Film Art Filter

Grainy Film photo of Union FlagEver since moving to digital photography, I have often thought of taking black and white photos.  Thing is, I use the ‘take it in colour and convert some later with PhotoShop or similar’.  Theflaw in this approach is, at least for me, is I never seem to get round to trauling through the hundreds (thousands) of photos and converting them to black and white ‘just to see’.  Net result?  Very few black and white photos. 

Art Filters to the rescue!  Now I know there are many posts and reviews around the net that slate such functionality built into Digital SLR cameras, but I think it is useful, epsecialy for people like me, where the post developing never actually happens.  To some, the more experienced photographers, they may seem a bit gimigky, watering down the skill required to use a ‘proper’ camera.  However, not all of us are pros (yet 🙂 ), so please remember that folks.

Why is it useful?  The biggest reason is using the feature in situe gives you an immediate answer to the question “What would it look like in black and white?”.  Not only that, you can alter the shot to get it right there and then, something you may not be able to acheive in post developement. 

Another reason for me is it can inspire further creativity, as you see other nearby opportunities that might look good in black and white.  You almsot start hunting for black and white photos.

Whilst on can take photos in black and white on most digital cameras, the Art Filters on my e620 includes ‘Grainy Film’ filter.  This is the only Art Filter I use and I like it as it has a lot more contrast compared to the monochrome setting, which always seems a bit too grey.  It doesn’t always work though, and you have to play around with exposure to try and get it right as somethimes the detail you’re after, get’s lost in the black or the white.  Some shots just seem to come alive when the colour is taken out.

So that’s my waffly defence for the Art Filters on the Olympus e620, especially the Grainy Film one ;-).

[nggallery id=5]